Development Setup
Backend Development
Common Steps
Install python version 3.10 or above. 3.12 is the current preferred python release for general development.
Note
Python 3.13 is supported, but Hue lights integration will currently not be functional due to mbedtls dependency.
Install git.
Install uv
We suggest using the standalone installer to make updates easier while uv is rapidly changing
Clone the main branch from the LedFx Github repository:
$ git clone https://github.com/LedFx/LedFx.git
Using uv, create a virtual environment, install all dependencies, and launch ledfx:
$ cd LedFx
$ uv run ledfx
uv can be used to launch ledfx at any time against the established venv.
Windows Specific Steps
Note
Do not install python from the Windows Store - it will not work with these instructions.
Warning
aubio-ledfx library which is a critical part of the audio processing for LedFX builds from source and can fail to build in many ways.
One common problem for example is if your Windows language is not English and uses non-standard characters
In that case, reach out in the LedFX discord dev_chat channel and ask for an aubio-ledfx wheel for the version of python you are developing on. 3.12 is preferred!
Install Build Tools for Visual Studio 2022
When asked for Workloads, select “Desktop development with C++”
Included:
C++ Build Tools core features
C++ 2022 Redistributable Update
C++ Core desktop features
Optional:
MSVC v143 - VS 2022 C++ x64/x86 build tools (vXX,XX)
Windows SDK
C++ CMake tools for Windows
Testing tools core features - Build Tools
C++ AddressSanitizer
The default install options are appropriate.
Reboot
Enable audio loopback which is default for a user install, but needs a manual step for dev builds, by calling once
$ uv run ledfx-loopback-install
Linux Specific Steps {#linux-dev}
Note
This assumes an apt based system such as ubuntu. If your system uses another package manager you should be able use it to get the required packages.
Within the shell in which you intend to install / build establish the follow build flag to ensure that GCC 14 does not throw errors on pre-existing weaknesses in the aubio-ledfx library during build time.
$ export CFLAGS="-Wno-incompatible-function-pointer-types"
Install system dependencies via
apt install:$ sudo apt install libatlas3-base \ libavformat58 \ portaudio19-dev \ pulseaudio \ cmake \
macOS Specific Steps {#macos-dev}
No additional steps required.
Local pytest
There are a collection of system level tests run as a test clamp around the rest api’s.
These are run as part of the CI actions when raising a PR and must run clean green before a PR is merged.
To run these local and / or develop more tests
Ensure you have local loopback installed, or you may hit failures once audio effects are under test
$ uv run ledfx-loopback-install
launch the suite of tests with uv which will ensure dependancies are installed
$ uv run pytest -vv
Frontend Development
Building the LedFx frontend is different from how the core backend is built. The frontend is based on React.js and thus uses pnpm as the core package management.
Note
The following instructions assume you have already followed the steps above to install the LedFx dev environment and have the backend running. If you have not done so, please do so before continuing.
Note
LedFx will need to be running in development mode for everything to
work. To enable development mode, open the config.json file in the
.ledfx folder and set dev_mode: true
Windows
1. Install Node.js and pnpm:
First, you need to install Node.js. You can download it from Node.js official website. After installing Node.js, you can install pnpm via npm (which is installed with Node.js).
$ npm install -g pnpm
2. Navigate to the frontend directory and install the dependencies:
$ cd frontend
$ pnpm install
3. Start LedFx in developer mode and start the pnpm watcher:
$ uv run ledfx
$ pnpm start
At this point, any changes you make to the frontend will be recompiled, and after a browser refresh, LedFx will pick up the new files. After development and testing, you will need to run a full build to generate the appropriate distribution files prior to submitting any changes.
4. When you are finished with your changes, build the frontend:
$ pnpm build
Linux
1. Install Node.js:
Node.js is a prerequisite for pnpm. You can install it using your distribution’s package manager. For Ubuntu, you can use the following commands:
$ sudo apt-get update
$ sudo apt-get install nodejs
2. Install pnpm:
$ curl -fsSL https://get.pnpm.io/install.sh | sh -
3. Navigate to the frontend directory and install the dependencies:
$ cd frontend
$ pnpm install
The easiest way to test and validate your changes is to run a watcher that will automatically rebuild as you save and then just leave LedFx running in a separate command window.
4. Start LedFx in development mode and start the watcher:
$ uv run ledfx
$ pnpm start
At that point any change you make to the frontend will be recompiled and after a browser refresh LedFx will pick up the new files. After development and testing you will need to run a full build to generate the appropriate distribution files prior to submitting any changes.
5. When you are finished with your changes, build the frontend:
$ pnpm build
macOS {#macos-frontend}
1. Install nodejs and NPM requirements using homebrew:
$ brew install nodejs
$ brew install pnpm
$ cd ~/frontend
$ pnpm install
2. Start LedFx in developer mode and start the NPM watcher:
$ uv run ledfx
$ pnpm start
3. When you are finished with your changes, build the frontend:
$ pnpm build
Document Development
See the Documents Development for more information.
How it works
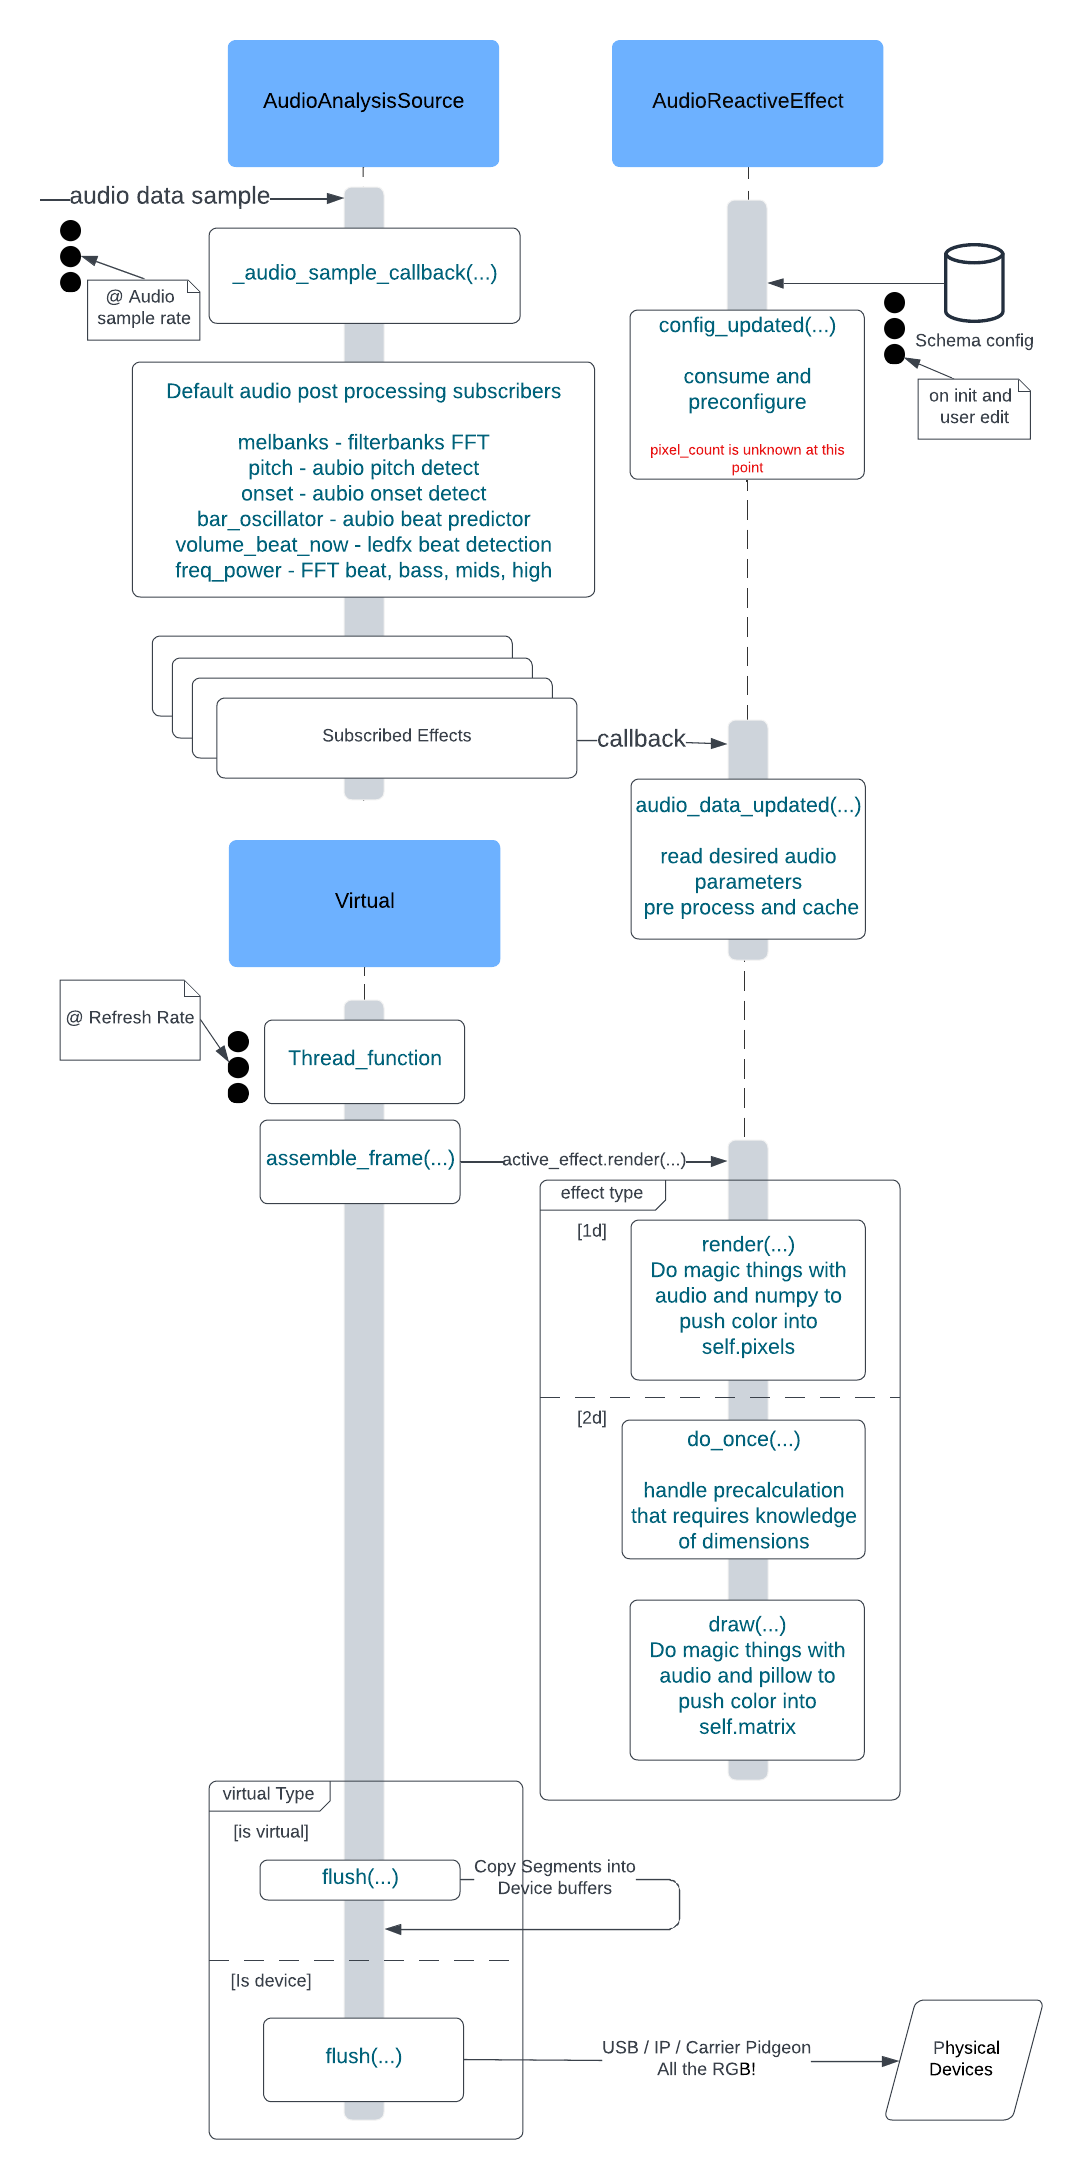
Well enough for discussional purposes. This diagram specifically illustrates audio reactive effects, temporal are similar but have their own thread loop independant of audio framing.
Useful Tools
VSCode extensions
For backend development, vscode is the IDE of choice.
There are many extensions that are of use to developers, including but not limited to
Github Copilot
Github Pull Requests
autoDocsting
GitLens
Prettier
Pylance
Python
Python Debugger
Tasks
Teleplot
Tasks
A simple extension to run tasks from the vscode taskbar at the bottom of the window.
Currently only the Build and Open Docs task is exposed. This task will install dependancies, build the docs and open in your browser, all with a single click!

Teleplot
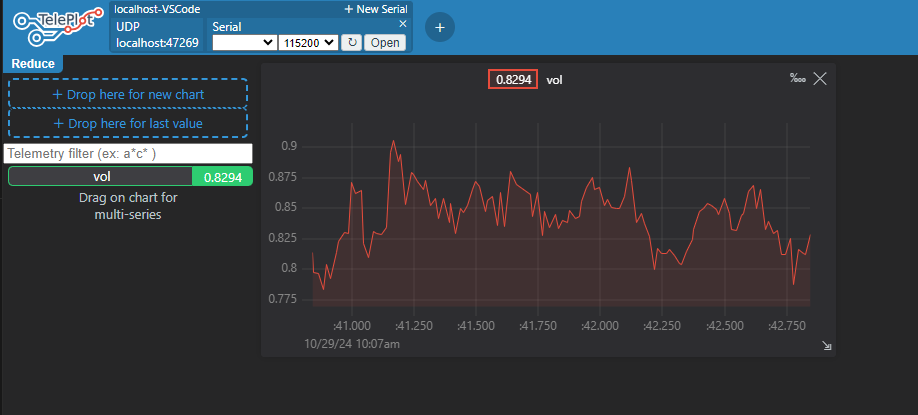
Teleplot is a great tool for visualizing data in real time, that can be the graphing equivalent of print()
It is used during development to quickly graph, and then thrown away, do not submit teleplot code to the main branch.
General documentation along with rich examples is at Teleplot Github
A helper Class has been added to the LedFx codebase to make it easier to use, and is available at ledfx/utils.py
simply import the class and use it as follows
from ledfx.utils import Teleplot

Teleplot.send(f"my_var_name:{my_var_value}")